Pages

Sunday, March 28, 2021

Salesforce: Lightning Email Template

There are 2 permissions related to the Lightning Email Template:

  1. Create Folders for Lightning Email Templates
  2. Manage Public Lightning Email Templates
Both of the permission names above are obvious on what permissions are given by enabling each of them.

Folders and Enhanced Sharing

If Folders and Enhanced Sharing for Lightning Email Templates have not been enabled, navigate to the Setup menu and search for Lightning Email Templates.

Once enabled, the email template folder and sharing access will similar to the report and dashboard folder, users with the above permissions will be able to:

  • Create folder and sub-folder to store Lightning email template
  • Share folder by user name, roles, public groups, territory
  • Share folder with access: manage, edit, view

Create Folder and Email Template

Navigate to the Email Templates tab, if you do not see it, click the 9-dots icon and type Email Templates. From here, you can create a New Email Template and New Folder. To create Sub Folder, open a folder and click the "New Folder" button, access to users in the subfolder will follow access given to the main folder.

Once the folder created, you can give the folder access to your team members, then start creating email templates. You should insert merge fields to increase your user's productivity by typing fewer words when sending email, sample:


Make sure to select the correct Related Entity Type, store it in the right folder, and make use of the merge field function.

You also can add files into the email template, when the user selects the email template, those files will be automatically added as attachments.

Additionally, users can store the email template in the Private Email Templates folder, so no other users can access or change it.


Using Email Template

In this sample, the email template created is for Case, make sure Email is added in Lighting Action on the Case page layout.

Open a case, click the Email tab, then select the email template created in the previous step.


Click the 3rd icon to insert an email template, including adding files as email attachments (1st icon), adding merge field (2nd icon), preview email (4th icon), clear and revert email template selected (5th icon), and pop out the email editor (6th icon).


Monday, March 15, 2021

Salesforce: Adding Signature in Email

It is simple to add an email signature in Salesforce, so all emails sent out will have your signature at the bottom of the email. Click your avatar, select Settings, and then My Email Setting.


Adding Images and clickable Links

However, many users would like to add the company logo or special image to their email signature. How to add these? 

You can't simply copy and paste the image to the signature box. So, a little effort here, you need to upload the image to "somewhere" so it is available for the public, such as https://inspireplanner.com/wp-content/uploads/2020/06/SimplySfdc-logo.png

Or, you can upload the image to Files in Salesforce; here is the step

1. Go to the Files tab and upload the image
2. Open the image and click "Public Link"
3. Click the "Create Link" button, then click the Create button
4. Copy the link, e.g. https://ap8.salesforce.com/sfc/p/90000000KY45/a/0o000000Qswm/mQ0LPPezg1w5wZB7QPMTN_u8.gneeZsOR7JHNdzeakY
5. Open the link in a new browser tab
6. Right-click and select "Open image in new tab", and copy the URL from the new tab, e.g. https://c.ap8.content.force.com/sfc/dist/version/renditionDownload?rendition=ORIGINAL_Png&versionId=0680o00000JjuVS&operationContext=DELIVERY&contentId=05T0o00000zNw6g&page=0&d=/a/0o000000Qswm/mQ0LPPezg1w5wZB7QPMTN_u8.gneeZsOR7JHNdzeakY&oid=00D90000000KY45&dpt=null&viewId=

Note: if your users do not see "Public Link", make sure the users have "Create public link" permission in Permission Set or Profile assigned.

Now we can put the URL into our email signature, but before that, let us learn a bit of basic HTML

<img src="img_girl.jpg" alt="Girl in a jacket" width="500" height="600">

The above is an HTML sample to show an image on the web browser, including our email signature. We can replace "img_girl.jpg" with our long URL from step (6), replace the "alt" value, and remove "width" and "height" for the original image size.

So, here is the email signature result


Let us reduce the size of the image and add some clickable links by tweaking the HTML
Regards,
<b>Johan Yu</b>
Visit <a href="https://www.simplysfdc.com">SimplySfdc</a>
Click here to <a href="mailto:yujohan@mail.com">email me</a>
<img src="https://c.ap8.content.force.com/sfc/dist/version/renditionDownload?rendition=ORIGINAL_Png&versionId=0680o00000JjuVS&operationContext=DELIVERY&contentId=05T0o00000zNw6g&page=0&d=/a/0o000000Qswm/mQ0LPPezg1w5wZB7QPMTN_u8.gneeZsOR7JHNdzeakY&oid=00D90000000KY45&dpt=null&viewId=" alt="my logo" width="275" height="56">


Friday, March 12, 2021

Adding Image to Salesforce

Adding Image to the Lightning page

This is actually pretty simple:

  • add a Rich Text component in Lightning App Builder
  • copy the image from a browser
  • paste into the Rich Text component 
Bonus point, since this is a component, you can make use of "Set Component Visibility" to show/hide the Rich Text component based on the record field value or device or user detail or permission. Also, can use filter logic to show/hide the component.

In the rich text component, you can combine this formatted text and additional images.


Adding Image to Page Layout

Salesforce does not have a field with the type = image, however, we can make use formula field return text with the Image() formula. 

IMAGE(image URL, alternate text [, height, width])

You can enter any URL into the image URL, such as: 
IMAGE("https://blogger.googleusercontent.com/img/b/R29vZ2xl/AVvXsEjf8aRfxLWfr0CQLooZltAZkJjucrOLoA13nE_-TGqy3Pwlf8yaXOV_zMubAY2XJv1qTmkX0-tnqAvr0za3Op2g3XQ4SF-ZNtW4NoRyFCB6rGzlXmbJaFM9QRS2RAt2PQUhU526dUn-d-E/w400-h100/sc+utf8.png", "Hello", 157, 627)


or simply populate the Image URL and alternate text for the parameter
IMAGE("https://blogger.googleusercontent.com/img/b/R29vZ2xl/AVvXsEjf8aRfxLWfr0CQLooZltAZkJjucrOLoA13nE_-TGqy3Pwlf8yaXOV_zMubAY2XJv1qTmkX0-tnqAvr0za3Op2g3XQ4SF-ZNtW4NoRyFCB6rGzlXmbJaFM9QRS2RAt2PQUhU526dUn-d-E/w400-h100/sc+utf8.png","Hello")


However, the above image is public or depends on external storage. We can make use of the Salesforce library to store the images, check out this article


Static Resources
Another option is to load the image as Static Resources.

IMAGE("/resource/This_is_image", "Hello")


Since this is a formula field, you can make use of IF() function to determine which image to show based on the criteria.


FREE Images Components 📷 by SharinPix

FREE Images Components 📷 by SharinPix is a native Salesforce picture management based on Salesforce images capabilities. Use the components to display images on a record page. Choose from a banner format, photo album, slideshow or a slider. You can even upload images from the components as well!

Check out this component from AppExchange, or the paid version Image/Photo Management for Salesforce for more features.


Sunday, March 7, 2021

Einstein Analytics: Upload Excel File with Special Characters

Use case: you received an Excel file that contains characters not in English that need to be loaded as a dataset in Einstein Analytics, here an example:


But since Einstein Analytics only take CSV file, you need to save the Excel file into CSV file. When you open the CSV file with a text editor, the multibyte characters such as Chinese, Japanese and Korean become "?", while extended ASCII characters such as Ã¶ are maintenance.


When we upload a CSV file to Einstein Analytics, by default, the File Encoding is UTF-8.


This will cause that special characters from extended ASCII not encode properly.


By changing the File Encoding to US-ASCII, this will solve the issue of characters in extended ASCII, but not for multibyte characters. So, if your data source does not have multibyte characters, this approach will work.


CSV UTF-8

If you are aware of when do Save As in Excel, there is an option to save as type "CSV UTF-8" (instead of just CSV). Here is the result when open the CSV file from the same Excel file with a text editor


Now, let us upload this CSV file to Einstein Analytics and keep the file encoding to UTF-8.


Friday, February 26, 2021

Salesforce: Lightning Record Page

What is the Lightning Record Page? 

Lightning Record Page is not the same as Page Layout, it is more than the Classic Page Layout.


From the above screenshot:
  • Red box = lightning record page
  • Blue box = page layout

Page layout (under the Detail tab) is part of a lightning record page. Page layout is required to show fields of the object until Dynamic Forms is widely available.

The "Related" tab contains related lists which are defined in the page layout.

Buttons at the upper right corner are also defined in the page layout, but this can be upgraded to Dynamic Actions which was introduced in the last few releases.


Lightning versus Classic

  • Lightning Record Page only for Lightning 
  • Page Layout is a heritage from Classic


Setup Lightning Record Page

Go to the object manager, open the object, and find the Lightning Record Pages tab, you can open the Lightning record page or view the page assignment.

there are two lightning record pages for this object


You can view and look up the lightning page assignment from the View Page Assignments button. Lightning Record Page can be assigned by:
  • App
  • Record type
  • Profile

From Lightning record pages in an object, click the View Page Assignments button, and you will be landed at the About Assignments tab,  use Look Up an Assignment to look up which lightning page is assigned to a specific App, Record Type, and Profile. 


Org Default tab displays the lightning page set as org default for that object, except where other assignments are defined, such as app default or app, form factor, record type, and profile.


App Default tab displays the lightning page set as the default lightning page for s specific App, except where other assignments are defined, such as App, Record Type, and Profile.


App, Record Type, and Profile tab to see if any lightning pages assignment based on App, Record Type, Profile, and Form Factor.


Assigning Lightning Page

Navigate to Lightning App Builder to view all lightning pages, or to create, edit, clone, or delete the existing lightning pages. 


By opening a lightning record page, you can see if the page is assigned to which app, record type, profile, also form factor.


But if you don't see anything here, it does not mean the lightning page is not used, as the page can be set as Org or App default.


To assign a lightning page, edit the lightning page, and click the Activation... button, from here you can:
  • Assign as Org Default
  • Assign as App Default
  • Assign based on App, Record Type, Profile, and Form Factor


Salesforce: Intro to Dynamic Forms

When Lightning introduced by Salesforce many years ago, it still depends on the "Classic" page layout. There has been a rumour for quite some time in the Salesforce community that we will be able to add fields directly in the Lightning app builder without the need for Classic page layout.

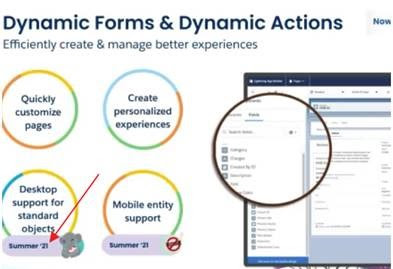
This finally comes true with Dynamic Forms. In the Winter '21 release, Dynamic Forms become Generally Available, but only for custom objects. As per, DreamTX 2020, the Dynamic Forms will be available in Summer '21 release, including for mobile support.


How to activate Dynamic Forms?

Dynamic Form needs to be enabled on each Lightning Record Page, so this means that you do not need to enable dynamic form for the whole org at once, you can enable it by the app, profile, or record type. So, you can pilot a profile with dynamic form, while all others still use Classic page layout within the same object.

Go to Object Manager, select the object, select Lightning Record Pages, to show all Lightning Record Pages that exist for that particular object, including other information such as Org Default, App Default, and Other Assignments.

There are two Lightning record pages for this object


Enabling Dynamic Forms

To enable dynamic forms, edit the lightning record page, this will open Lightning App Builder, select the Record Detail component, then click Upgrade Now button.


You will be presented with a wizard to follow to migrate the fields to the dynamic form. Optionally, you can select to enable migrating the fields and section into the Accordion component to improve the new page performance.


One-Way Ticket

Once a Lightning page is upgraded to Dynamic Form, you can't downgrade it back to Classic page layout. However, you can simply delete the Accordion or Field Section component, then adding back the "Record Detail" component which uses Classic page layout.


Page-level ad