Pages

Monday, December 12, 2022

Salesforce: Using Formula Field

The formula field is one of the best features of the Salesforce platform for admin (and developer). Despite the limitation and restrictions, it still serves a lot of benefits. 

Some restrictions:

  • You can’t use long text area, encrypted, or description fields in formulas.
  • The value of a field can’t depend on another formula that references it.
  • You can’t delete fields referenced in formulas. Remove the field from the formula before deleting it.


But, where the formula field can and cannot be used?

Page Layout - Yes, including dynamic form, search layout, and compact layout. But the formula field is not searchable.

Report - Yes, including use as a filter

List View - Yes, including use as a filter

Validation Rule - Yes, except that you can't set the error message location at a formula field

Approval Process - Yes

Sharing Rule - No, the criteria based sharing rule does not support by formula field, you can vote on the idea here, here, and here; here is the original idea but has been marked as partially delivered although the item delivered has nothing to do with sharing rule.

Email TemplateYes

FlowYes

SOQL - Yes


If there are other places we can or cannot use formula fields, feels free to comment below this blog. 


Reference:

Monday, November 28, 2022

Salesforce: Email-to-Case and EmailMessage object

Two years back, we shared about the EmailMessage object here, this blog will share the relationship between how the email is stored in the EmailMessage with email-to-case.

This blog is written for email header-based threading, not the older string-based threading, check out the difference here.

Email Header

Outlook Email Properties

There are 3 main pieces of information from the email header that determine email header-based threading.
  1. Message-ID: this is a unique Id from each email sent.
  2. In-Reply-To: when someone reply, reply all, or forward email, this will be the Message-ID of the email replied or forwarded -- this will be not available for a brand new email
  3. References: this will contain ALL Message-ID in the past related to the email, because of the the email is replied or forwarded -- this will be not available for a brand new email
Email header example in Outlook:
Message-ID:
 <SJ0PR04MB82591BAF72F77B70A462298BA1139@SJ0PR04MB8259.namprd04.prod.outlook.com>
In-Reply-To:
 <BYAPR04MB4423787D7E4151F21F0F7A0AAF109@BYAPR04MB4423.namprd04.prod.outlook.com>
References:
 <BN8PR04MB58573540EF22FB7F96C770C1BA0D9@BN8PR04MB5857.namprd04.prod.outlook.com>
 <BN8PR04MB5857B720DAEE1DD7536615ADBA0C9@BN8PR04MB5857.namprd04.prod.outlook.com>
 <DM8PR04MB8007D5BDCFA47E407444341FA50F9@DM8PR04MB8007.namprd04.prod.outlook.com>
 <DM6PR04MB64935C0BAD0CE8B45F2231DDDB0F9@DM6PR04MB6493.namprd04.prod.outlook.com>
 <BN8PR04MB585790F2E1E8B2EBC6B05310BA0F9@BN8PR04MB5857.namprd04.prod.outlook.com>
 <DM6PR04MB6493374129A5668B5722CFC0DB0E9@DM6PR04MB6493.namprd04.prod.outlook.com>
 <BYAPR04MB4423787D7E4151F21F0F7A0AAF109@BYAPR04MB4423.namprd04.prod.outlook.com>

Another sample from Gmail:
Message-ID:
<CAEA+Pe0BKtiu8O8TRC0vQC2gu+OmbR6PrEdS93+-0yOxhGzEVQ@mail.gmail.com>
In-Reply-To:<CAG1Mi6WPzXh_B3Aw5VcF8mJG1F7AjdqOZHw=Lc+p0+oiH4O2Aw@mail.gmail.com>
References:
<CADeEcsvRNwQxAP1qE4gqKeUGtqMLNR3qu+qcD4Q1p4K-CJKzqg@mail.gmail.com> <CAG1Mi6WPzXh_B3Aw5VcF8mJG1F7AjdqOZHw=Lc+p0+oiH4O2Aw@mail.gmail.com>


ThreadIdentifier

ThreadIdentifier is a field in the EmailMessage object that will be auto-populated when sending emails or receiving emails to Salesforce, including manually logged emails.

For email-to-case, ThreadIdentifier is the Message-ID of the 1st email sent by a user as a brand new email (not reply/forward), and that email possibility not be sent to the email-to-case email address alias yet.

Example:
- A send email to B [Message-ID = A123]
- B replies A, and also cc to email-to-case email address [Message-ID = B888]
ThreadIdentifier in this scenario is A123, even though A did not send the email to the email-to-case email address. 


Email-to-Case Threading

As per this article, there are 2 main points that determine if an email sent to email-to-case alias will create a new case or be attached to an existing case:

  1. Looks for "MessageIdentifier" in the Salesforce EmailMessage object to match with the "In-Reply-To" email address in the email header, if not found, continue to (2) 
  2. Looks for "MessageIdentifier" in the Salesforce EmailMessage object to match with the "Reference" email address in the email header 

If found, link that email to the case by looking at ParentId (which is Case Id) from the matching record of the EmailMessage object. So, the matching here is not based on ThreadIdentifier. 

First scenario:
1. A create a brand new email and send it to B and C
2. B reply all and forward the email to email_alias@domain.com
3. C reply all and forward the email to email_alias@domain.com

The above scenario will create 2 cases:

  • with the same ThreadIdentifier, but MessageIdentifier generated from email B (2) and email C (3) is different
  • all references in the following emails will not contain the original email A (1) in their reference, so these 2 cases will be continuously run independently.


Second scenario:
1. A creates a brand new email, sends it to B, also to email_alias_1@domain.com and email_alias_2@domain.com 
2. B reply all

What will happen from the above scenario:

  • The first email from A will generate 2 cases with the same MessageIdentifier
  • When B hit reply all, there are 2 streams of email reaching Salesforce, and both looking for the same MessageIdentifier, the system will simply attach the email to any of these 2 cases, but from my trail, these 2 streams' of email are attached to the last cases created. so there will be 3 emails in the last case created


Third scenario:
1. A creates a brand new email and sends it to B, also to email_alias_1@domain.com  
2. B reply all and add email_alias_2@domain.com

What will happen from the above scenario:

  • The first email from A will generate 1 new case
  • When B hit reply all and adds new email alias linked to email-to-case, the "In-Reply-To:" in the second email will point to the Message-ID of the first email which is the MessageIdentifier for the case created in the first email, so there will be no new case created here
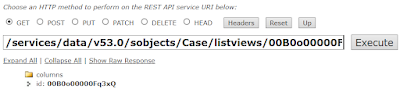

Sample querySelect ParentId, CreatedDate, Status, Subject, FromAddress, ToAddress, CcAddress, MessageIdentifier, ThreadIdentifier, Id, ReplyToEmailMessageId from EmailMessage where CreatedDate = Today


Reference:


Saturday, November 26, 2022

Salesforce: Send List Email (3)

his is to continue Salesforce: Send List Email and Salesforce: Send List Email (2) written months ago. 

You can send mass email to a maximum of 5,000 external email addresses per day per licensed Salesforce org based on Greenwich Mean Time (GMT), and sending email from list view is considered as mass email. For example, if you have johndoe@example.com in your email 10 times that counts as 10 against the limit.

You can send mass emails only to contacts, person accounts, leads, and your internal users. 

You can send an unlimited amount of emails through the Salesforce UI to your internal users, which include portal users.

To mass email from the list view:

  1. Select/create the list view
  2. Select the contacts/leads checkbox
  3. Click the "Send List Email" button, if you do not see the button, make sure the button is added to the list view and you have "Allow sending of List Emails" permission, see this blog for detail.


In the Send List Email window

  • You will see the balance of send email limit remaining
  • You can select "From" based on your setup, including Organization-Wide Email Addresses
  • You can use an email template, merge fields, and attach files
  • You can Send Later and Save as Draft
  • Each recipient will only see their name as the recipient, not the whole recipient's name

Tips: to see your draft email, looks for "List Email" from the 9-dots icon


Reference:


Wednesday, October 26, 2022

Salesforce: Field Dependency across Record Type

This is to continue the previous blog Record Type on Creation, the scenario here: for the same user, the list of values for a picklist field configured as a dependent field should be different across record types.

Steps:

1. Set the field as a dependent field


2. Include ALL values of the dependent field in the controlling field, not only for a specific record type


3. Configure the field values available for each record type


4. Done


Now, you should see different available values for each record type for the same field.


Same user, same field, different record type, and different list of values.


Salesforce: Record Type on Creation

Background: a user does not see the Record Type prompt when creating a new record.

This is probably caused by:

1. The user profile is not enabled for certain record types of an object

To check this, go to the user profile, not to the object.

Looks for Record Type Settings


If you have Enhanced Profile User Interface enabled, look for Objects Settings, then Record Types and Page Layout Assignments


Additionally, you also can enable record type for certain users with permission set, see this blog.

Note: even if a user can't create a record with a specific record type, because it is not enabled, the user will be still able to access the record, as that is controlled by record visibility.

This scenario (no record type prompt) only happened when there is only 1 record type enabled for the user.

2. The user sets Default Record Type

Go to User Setting, and looks for Set Default Record Type under Display & Layout.

Note: this is not Advanced User Details and is not configurable by the admin, so the admin needs to log in as the user to check.


Reference:

Friday, October 21, 2022

Salesforce Lightning URL Hack

Scenario: Universal Inc would like to increase staff productivity with fewer clicks when creating a Case from the Account page, users still need to enter other fields, but a few fields have been populated by default:

  • Skip record type prompt
  • Type = Other

Solution: create a custom button and add it to the page layout. Here is the URL:

/lightning/o/Case/new?defaultFieldValues=RecordTypeId=0125g0000022dlQAAQ,AccountId={!Account.Id}&Type=Other


Reference:

Salesforce Inbox Included

More than a year ago, we wrote about Salesforce Inbox, and things have changed since the blog was written, mainly on the license, permissions set, and permissions. Here is the update:

In Summer '22 release, it was announced that Sales Cloud Unlimited and Performance Editions Now Include Inbox Without an Add-On License. If you are not using Unlimited and Performance Editions, you can still buy additional Inbox licenses separately (which also include the full Einstein Activity Capture license), check this

The new standard permission set is called Inbox Included, which contains Use Inbox permission, or as admin, you can create a custom permission set and select license = Inbox.


Or, you also can use the standard permission set Sales Cloud Included Bundle, which includes all permissions for Sales Cloud Unlimited. If you also purchased Sales Cloud Einstein and use the Sales Cloud Einstein permission set, Use Inbox permission is included in that permission set, so no need to assign many duplicates and unnecessary permission sets, always look for simplicity and clarity.

So again, what is Inbox? It is a productivity tool to work with Salesforce from your email client.

  • Contextual CRM — see relevant CRM records in your email client.
    • Easily create Lead/Contact if the sender or recipients are not in Salesforce.
  • Create — allow users to create new records based on Global Actions configured in Lightning.
  • Search — stay in Outlook/Gmail to search and access Salesforce records.
    • Include: view detail and related tab, edit records, log email, open in Salesforce, and perform Chatter actions.
  • Managed Task — create and manage Salesforce’s Tasks from Outlook.
  • Log Emails — including incoming and outgoing emails.
  • Insert Availability — let your recipient select a time slot for a meeting based on your calendar.
  • Email Templates & Text Shortcuts — reuse and standardize email templates for teams and personalize text shortcuts.
  • Track Outgoing Emails and Links — get insight when the recipient read and clicks links in the email sent.
  • Send Later — ensure that people receive your email when they are most likely to act upon it, this is also available when sending email from Salesforce.com
  • Mobile apps — manage customer communications to include Salesforce CRM records from mobile.

Reference:


Monday, October 17, 2022

Salesforce Pipeline Inspection

Pipeline Inspection probably is an upgrade of the list view, but just for the Opportunity object. Before we discuss further Pipeline Inspection, let's see what is required to access Pipeline Inspection.

To access Pipeline Inspection, you need to have Pipeline Inspection User permission, which is available under the Pipeline Inspection Included permission set. You will have this Pipeline Inspection license if you use Unlimited or Performance edition. In short, you must be on Unlimited or Performance edition, then assign a permission set that has Pipeline Inspection User permission enabled.

"Pipeline Inspection gives sales teams a consolidated view of pipeline metrics, opportunities, week-to-week changes, AI-driven insights, close date predictions, and activity information. With this intelligence, sales teams can focus on the most important opportunities and forecast revenue more accurately." quote from salesforce article. Those features are great for reps and their manager to manage their pipeline.


Period
Starting from the top, you can select opportunity closing: This Week, This Month, This  Quarter, Next Week, Next Month, Next Quarter, or Custom.

For
Then, you can select opportunities owned by: Me, My Team (people under me in the role hierarchy), My Opportunity Teams (opportunities where I am added to the Opportunity team), and every user below me under the role hierarchy, users available here:

  • Active users
  • Not assigned with Chatter profiles
  • Include Partner Community users, for internal users', the name end with 's Teams, such as John Smith's Teams, while partner community users only have the full name. There is no way to hide partner community users from the dropdown, so vote for this idea. When selecting an internal user, because it is "Teams", this will include all opportunities owned by users below the role hierarchy.

Important Opportunities
Next is the "Important Opportunities", click this icon to filter opportunities that you have manually marked as important. This marking is for each user and can't be shared with other users. You can mark up to 200 opportunities as important. Those opportunities marked as important will be shown in the "My Important Opportunities" view too.


Pipeline Inspection Metrics
There are 8 metrics below the selection:

  1. Total
  2. Closed Won
  3. Commit (with forecast categories of Closed Won or Commit)
  4. Best Case (with forecast categories of Closed Won, Commit, Best Case)
  5. Open Pipeline (with forecast categories of Commit, Best Case, Pipeline).
  6. Closed Lost
  7. Moved In (total opportunities moved into the selected period, including opportunities with closed date moved into the selected period and new opportunities created)
  8. Moved Out (total opportunities moved out of the selected period, including opportunities with closed date in the selected period when it started and new opportunities created during the period)

Unfortunately, you cannot customize the metrics, such as using the Stage Name (without changing Forecast Category), renaming, or hiding any of the metrics, so vote for this idea

Clicking the metric will filter the opportunities shown in the table below the metrics.

When clicking the Opportunity tab, all users will always land in Total metrics for This Month for Me, it will be great if the system remembers my last filters and metrics selected.

Setup
1. Enable Pipeline Inspection from the setup menu, this will auto-enable historical trending for opportunities.
2. Enable the Pipeline Inspection button in the Opportunity object, look from "List View Button Layout".
3. Assign permission set to users, it can be the standard permission set "Pipeline Inspection User", or custom permission set with the Pipeline Inspection license.

View
Once setup is completed, to access Pipeline Inspection, users must click the "Pipeline Inspection" button from the Opportunity tab, so this is not to replace the list view. Admin is unable to set the user by default landed at Pipeline Inspection when clicking the Opportunity tab. But, the system will remember if you are in Pipeline Inspection or list view, the next time you click the Opportunity tab, you will be landed based on your last usage. 

As mentioned in the important opportunities above, there will be 2 views available by default, "My Pipeline" (default) and "My Important Opportunities". You can create a new view for yourself or for your users, but you cannot modify the default "My Pipeline" view for your users, so vote for my idea here.

There are 10 fields added by default:

  1. Opportunity Name (with Deal Insight overview)
  2. Mark Important
  3. Account Name
  4. Amount (with the increase or decrease indicator)
  5. Close Date (with indicator initial push date and Einstein prediction)
  6. Stage
  7. Recent Activity (how many days ago)
  8. Forecast Category
  9. Next Step (with an indicator if not updated and when the last update)
  10. Owner Full Name
There are 3 useful fields that can be added:
1. Push Count
2. Opportunity Score
3. Top Insight (if you have Einstein Opportunity Insights enabled)

Sample Pipeline Inspection

Deal Insight Overview next to the Opportunity name:

Insight for Close Date

Stage changed information

Information for the Next Step


Idea Exchange
Because Pipeline Inspection is pretty new and only available for Unlimited, Performance, and users that purchase the Revenue Intelligence license, there are not many ideas created and voted on by the community, here are a few worth to vote:


Friday, October 14, 2022

Salesforce Scoping Rules

Quote from a Salesforce article "Scoping rules let you control the records that your users see based on criteria that you select. You can set up scoping rules for different users in your Salesforce org so that they can focus on the records that matter to them. Users can switch the set of records they’re seeing as needed."

As above, scoping rule is not similar to the restriction rule, where the restriction rule prevents the user to access certain records, while scoping rule is just to scope for the user to focus on a set of records, so users can still access all other records that they can access according to the sharing rules settings.


As of now (Winter '23 release), scoping rules are available for custom objects, Account, Case, Contact, Lead, Opportunity, Event, and Task. It is available in Unlimited or Performance edition, if you use Unlimited or Performance edition but do not see scoping rules available in the objects mentioned above, reach out to Salesforce support to enable it.

When a scoping rule is applied to a user, the data that the user sees in list views and reports are filtered by the criteria you set.

Follow this article to create scoping rules, there are 2 options for User Criteria when creating a scoping rule:

  1. Criteria Type = User Criteria
  2. Criteria Type = Permission Criteria


User Criteria, select a field in the user object as the criteria of who the rule will apply, unfortunately, you can't use the field of the child object such as Profile Name or Role Name at this moment, so just using their Id will work, and there is no option to set multiple criteria and use AND logic.

On the Record Criteria, set criteria to filter records that fit into the scoping. Here you can use the field from a child object, but no option to set multiple criteria and use AND logic.


Permission Criteria, this uses custom permission, then defines the custom permission under the permission set, then assigns users to that permission set. 


Once the custom permission and the permission set are created, you can use the custom permission in scoping rule.


Make sure the scoping rule is active and let us see how it works in the list view and report. In the list view Filter by Owner, select Filter by scope.


The same for the report filter, select Filter by scope.


The result of the above list view and report is based on the record criteria defined in the scoping rule. As you see that "Filter by Scope" is just an option, meaning your users can select other filters option too.

Known Issue: if the User Criteria contain space, this will not be saved by the scoping rule, and this cause the scoping rule will not to run for the users defined, check out this.


Reference:


Thursday, October 13, 2022

Salesforce Case Closed Date

Case object in Salesforce is a bit different and special compare to other objects. There are additional fields such as Date/Time Opened and Date/Time Closed. 

The Date/Time Opened field value is the same as the Created Date field in other objects, this field can be added to the case page layout.

The Date/Time Closed field is auto-populated when the case status is changed to system Closed, this field can be added to the case page layout too, but the field is not available for history tracking.


Report

In the report, there are additional fields available as screenshot below:


Each pair have the date time field and date only field:

1. Date/Time Opened with Opened Date

2. Date/Time Closed with Closed Date

3. Case Date/Time Last Modified with Case Last Modified Date

But, the Created Date field will not available for reporting in Case.


Date/Time Closed field

As mentioned above, when the case status is changed to system closed, the date/time closed field will be auto-populated as when the case is closed.

However, when the case is re-open, the value of the date/time closed field will be set to blank and populate back with when the latest case is closed.


SOQL

Sample SELECT Id, CreatedDate,ClosedDate FROM case WHERE Id = '5000o00002J2JQzAAN'


The format for both fields here is date/time.


Salesforce Einstein Insight


Einstein Account Insight and Opportunity Insight are part of Sales Cloud Einstein. Recently, a few items from Sales Cloud Einstein are added as part of the Unlimited or Performance edition, which includes:

  • Salesforce Inbox
  • Sales Engagement (formerly High Velocity Sales)
  • Sales Cloud Einstein Included, which is: Einstein Opportunity Score, Einstein Lead Score, Einstein Forecasting, and Einstein Automated Contacts.

However, Einstein Insight is not included in the Unlimited or Performance edition. So, you still need to get the additional Sales Cloud Einstein licenses, even if you are in the Unlimited or Performance edition.

So, what is inside Sales Cloud Unlimited and Sales Cloud Einstein permission set?

Sales Cloud Unlimited permission set license
Notice that both Einstein Insights are not in the above permission set license.


Sales Cloud Einstein permission set license

Once you have the license acquired, a few steps need to be performed:

  1. Enable Einstein Account Insights
  2. Enable Einstein Opportunity Insights
  3. Assign users with the "Sales Cloud Einstein" permission set

Once the setup is completed, the system will take up to 24 hours before the initial batch of insights is available, so not all accounts and opportunities will have insights. You will see the insights as a component in the Home, Account, and Opportunity record pages.

How to see records that have Insights?

For opportunity, create a list view and add the "Top Insight" column, additionally, you also can see it from the "Einstein Opportunity Insights" tab, make sure to enable the "Einstein Opportunity Insights" tab for the profile.

For account, unfortunately, we don't have this in the list view (as per Winter 23 release), so only from the "Einstein Account Insights" tab, make sure to enable the "Einstein Account Insights" tab for the profile.

Unfortunately, you cannot run a report to export the insights, so vote for this idea. However, you can query AccountInsight and OpportunityInsight objects, sample:

SELECT Id, AccountId, Title, TrendType, Type from AccountInsight 


SELECT Id, OpportunityId, Rationale, Title, TrendType, Type from OpportunityInsight 


Reference:

Wednesday, September 7, 2022

Salesforce: Dynamic Related List

We discussed dynamic form here and here, dynamic actions here, and this blog will continue with Dynamic Related List. 

So, what is the dynamic-related list? The dynamic related lists allow you to choose the list’s fields and sort order, apply filters, specify the component label, and configure actions for the related list, without dependency on page layout. 

To set up a dynamic related list, add the Related List - Single component, then upgrade it to Dynamic Related List - Single. 


Click the "Upgrade Now" button to upgrade it to Dynamic Related List - Single


** As per the Winter '24 release, you can simply drag Dynamic Related List - Single, no need to upgrade from Related List - Single component.

Limitation/issue as of Summer '22 release:

  • If you have the Related List Quick Links component, the Related List - Single / Dynamic Related List - Single component will not be available in the Related List Quick Links component
  • Dynamic Related List - Single component will show only up to 10 records and does not have "View All", vote for this idea (by now, the idea has been delivered).
  • To use Related List - Single, the related list must be added to the current page layout.
  • Dynamic Related List - Single does not support all objects; please vote on this idea Dynamic Related List - Single to support all objects

Notes:
  • Because it is an independent component, you can have many Dynamic Related List - Single components, such as one component showing Open Cases and another one showing Cases closed in the last 30 days. 


Reference:


Sunday, August 28, 2022

Salesforce: Dynamic Forms (2)

After 18 months from my first dynamic form blog, we finally see a few standard objects covered by the dynamic form. As per the Winter '23 roadmap, we can enable Account (incl. person Account), Contact, and Opportunity with dynamic form.


Overall, the dynamic form functionality is still the same as per the initial release, where we can show/hide each field based on Record Field or Advanced, field with filters defined will have the eye orange icon next to it.


Record Field
  1. Field: another field in the same object
  2. Operator: depends on the selected Field (1) type, e.g. Contains, Equal, Not Equal
  3. Value: also depends on the selected Field (1) type
Advanced
  1. User, which is user info/detail
  2. Permissions, if the user has specific permission 
  3. Record, this can be a value from a related field, such as Created By Profile Name
Tips
you can't select more than 1 value in each filter, but you can add the same field in filters, then use "any filters are true" or filter logic.

Samples of use cases to use the dynamic form

  1. To hide/show fields from a specific profile in the layout, even the profile has visibility on the field-level security
  2. To hide/show fields from users without permission, such as View and Edit Converted Leads
  3. To hide/show field when the user selects a value, such as, when user Type = Customer, show Customer No, otherwise, hide Customer No field

But, do we still need the classic page layout when using the dynamic form? 

1. Record buttons are still determined by page layout, you can handle this by enabling dynamic action, check out here.

2. Related lists are also determined by page layout, you can handle this by removing the "Related Lists" component and adding the Related List - Single component for each related object. However, if you use the "Related List Quick Links" component (which is a great feature since Classic), adding "Related List - Single" will not add the object to "Related List Quick Links", so come and vote for this idea


Wednesday, August 17, 2022

CRM Analytics: Trend dataset with Dataflow or Recipe

Background: The dataset produced is only for the last 30 days of data, but we need to keep the data for much longer.

Solution: use dataflow/recipe to store the trend in a new dataset

1. Download the dataset in a CSV file and load it as a "trend" dataset

2. Use dataflow/recipe to read from the original and trend dataset

3. Append both datasets

4. Use computeRelative node (dataflow) or "Multiple row formula" transformation (recipe), Partition By the key field, this is to mark the 1st record

5. Filter out rows not marked as 1st record

6. Done


Recipe


Multiple row formula


Sunday, July 10, 2022

CRM Analytics: Only in Recipe and not in Dataflow


Here are a few things you can do in  Recipe, but not in Dataflow.

Rename and Save as
Yes, you can download JSON in dataflow and upload it to a newly created dataflow with a new name.

Add Description in each node
Unless you have the EADashboardHelper extension, you can't add descriptions in Dataflow

Join (left, right, outer, inner, cross)
This has been the power of recipes from the beginning

Preview data
Some users would like to see the data after transformation without the need to run it

Column profile
Analyze data at a glance (with a sampling of data)

Direct Input data
If only the objects are not synced to the CRM Analytics platform, this useful to get real-time data from Salesforce

Extract data
Able to write data to Output Connection and CSV

Easier to aggregate, bucket, trim, substring, replace, split, concatenate
You still can do those transformations in dataflow, but just easier in the recipe

Rename field label and API name
You can create a new field using computeExpression in dataflow, but cannot rename the existing field

New machine learning transformations not in dataflow
- Detect Sentiment
- Time Series Forecasting
- Predict Missing Values
- Cluster

A few other things worth mentioning
- Prefix in Dataflow = 02K, recipe: 05v
- Unable to run recipe when there is terminating node without write dataset
- Edit recipe in JSON is complicated compared to dataflow


Is anything else not listed above or incorrect? Comment below so I can add them, thank you!


Reference:

Thursday, June 30, 2022

Salesforce: Query Org ID and Sandbox

You can get your salesforce Org ID and other info from Company Information in the Setup menu. But, if you need to get the data from SOQL, here is the sample query

SELECT Id, Name, InstanceName, DefaultLocaleSidKey, TimeZoneSidKey FROM Organization


While for Sandbox info, you can go to the Sandboxes in the setup menu in Prod. The same, you can use SOQL to get the information, but you need to use Tooling API. 
SELECT Id, SandboxName, Description, LicenseType, HistoryDays FROM SandboxInfo

The Id returned here is SandboxInfo ID, not the Org ID and unfortunately, we can't get the Org ID.


You will get the same result if perform query with Rest Explorer from Workbench
GET /services/data/v53.0/tooling/query/?q=+Select+Id,SandboxName,LicenseType,Description+from+SandboxInfo


Reference:

Wednesday, June 8, 2022

Tips for Salesforce Data Cleaning

Data is arguably one of the most important aspects of a business. Good data helps drive decisions that improve products, services, and customer experiences. If your organization has bad Salesforce data, you will start to notice inconsistencies down the line that can challenge marketing campaigns, sales initiatives, reporting, and analysis.

Data naturally decays over time, so without a proper cleanse that fixes recurring errors, bad Salesforce data will continue to worsen and hinder your business. In this blog, I’m going to identify common types of bad data, why you should complete Salesforce data cleaning, and give you tips for improving these processes.

What is bad Salesforce data?

If you use Salesforce, you may already notice data-related problems due to input error, poor data collection methods, or natural data decay. Bad data, like the types listed below, has been known to cost organizations an average of $13 million in revenue each year. 

These are the most common types of bad Salesforce data that you may encounter:
  • Duplicates: Multiple different records that have similar or the exact same data.  
  • Inaccuracy: Typos, data entry errors, or fields that are filled in incorrectly.
  • Irrelevancy: Records or contact information that is outdated or no longer relevant.
  • Inconsistency: No standardization with formatting fields within records.
  • Incomplete: Missing data in key fields, such as company size, industry, or title.


The reasons for Salesforce data cleaning

Good data improves productivity and insights, which helps organizations reach business goals and stay ahead of the competition. Day to day, good data can help your team make smarter decisions that drive growth and revenue as well as increase overall efficiency. It can also help your team with audience targeting that increases the effectiveness of campaigns. 

Clean data is good for your customers as well. It can help build better customer relationships when you know exactly what they need, so your team can offer more appealing services or products.

And finally, good quality data open your organization to greater and more targeted opportunities that increase your competitive advantage and profitability. 


Five tips for a Salesforce data cleanse

Salesforce data cleaning is an ongoing process that helps your business improve data quality over time. Follow these four tips to increase the effectiveness of your Salesforce data cleanse.

Identify root causes

The first step in cleaning Salesforce data is to identify where the majority of errors occur. Is your team inputting data manually and making mistakes? Or are you relying on a data collection system that doesn’t have the right integrations with your business systems? 

These inconsistencies or errors within your current data collection methods may be the cause of bad data. Catching bad data at the source will help you determine what needs to be changed or improved. This initial data audit provides a clear path toward quality data, whether it be through more team training, better software, improved data governance, or something else. 

Choose the right tools

Whether your organization deals with hundreds or thousands (or even millions) of datasets, having the right tools to effectively collect and manage this data is critical to maintaining it. Manual data cleaning for datasets this large is also generally too big of a task for a single data scientist or administrator. 

Having the right data cleaning tools in your systems accelerates cleaning processes and minimizes manual tasks. These tools can automate cleaning tasks, with specific functions that target and correct data quality issues, such as duplicates or missing values.

In addition to adding data cleaning software, implementing an integrated web form and data collection platform like FormAssembly helps ensure that data entering your Salesforce Org is clean and high-quality from the start. 

Standardize processes

The phrase “garbage in, garbage out” is just as relevant to data collection as any other process. Manual processes that begin with a customer filling out a paper form and end with an employee inputting data by hand into Salesforce are prone to numerous errors. 

These processes make it virtually impossible to have consistent validation or standardization of data collection methods. Adopting online forms for streamlined collection, training employees on validation standards, and using data cleaning software help eliminate many of these data errors. 

Setting standards for data ensures that all data entered into Salesforce through a web form follows the same formatting (email, industry type, address, etc.). Standardization minimizes the discrepancies that lead to duplicate records and helps maintain data quality over time.

Enforce rules

Without rules that are set up correctly, data will never be cleaned or completed. Users are joining and leaving the company, which also means the new users may not be aware of existing rules. Manual intervention wastes a lot of time for small teams and is nearly impossible for larger teams.

Setting mandatory fields, dependency fields, and validation rules are easy and can be implemented by Salesforce admin within minutes.

Complete routine audits

Once you have completed a comprehensive Salesforce data cleanse, the process does not stop there. Without proper maintenance, data errors and data decay will inevitably continue to occur. Conducting routine audits means that you will discover and resolve issues faster, while providing your organization with an in-depth look at how data is being processed and stored.

A data quality audit should always include error identification, error resolution, and improved standardization protocols. These audits, when completed regularly, keep your data clean and give your team the information they need to improve processes, analyze accurately, and maintain productivity. 


Clean data starts at the source

Getting quality data into your Salesforce Org efficiently and accurately is the next step in keeping data clean long-term. A data collection platform with advanced Salesforce integration like FormAssembly helps ensure clean, high-quality data from the source—online forms. 

Using FormAssembly’s web form builder, you can easily create Salesforce-connected forms that create or update data for standard and custom objects, prefill forms, and more. In addition, FormAssembly’s newest solution, Workflow, makes it possible to build entire data collection workflows to further reduce errors, accelerate processes, and increase productivity for your team. 


Learn more

With quality data available to leverage, your team has more time, knowledge, and resources to spend driving initiatives that help increase revenue. To learn more about how FormAssembly helps with clean Salesforce data collection, visit their website or find them on AppExchange.


Tuesday, June 7, 2022

CRM Analytics: Dashboard URL

CRM Analytics Dashboard URL Id starts with prefix 0FK, which is shared between dashboard and lens. We can share the dashboard with users in Analytics Studio or Analytics tab, although ideally, Analytics Studio is intended for the dashboard builder. The Analytics tab will let users stay in the Lightning app.

When working on a dashboard in Analytics Studio, we will see the URL, for example: 
https://domain_name.lightning.force.com/analytics/dashboard/0FKB0000000LU1AOAW

If we share the above URL with a user, the dashboard will be opened in Analytics Studio.

If we only put the Id after force.com/ such as https://domain_name.lightning.force.com/0FKB0000000LU1AOAW
this will be translated to
https://domain_name.lightning.force.com/lightning/page/analytics?wave__assetType=dashboard&wave__assetId=0FKB0000000LU1AOAW&wave__folderId=00lB0000000JlslIAC
which will open the dashboard in the Analytics tab

while a lens will be translated similarly, with the difference in the assetType parameter, such as
https://domain_name.lightning.force.com/lightning/page/analytics?wave__assetType=lens&wave__assetId=0FKB0000000NQfJOAW&wave__folderId=005B0000003vvjQIAQ
this will open the lens in the Analytics too

There is another option to open the dashboard in the Analytics tab
https://domain_name.lightning.force.com/lightning/r/Lens/0FKB0000000LU1AOAW/view
this will be translated as
https://domain_name.lightning.force.com/lightning/page/analytics?wave__assetType=dashboard&wave__assetId=0FKB0000000LU1AOAW&wave__folderId=00lB0000000JlslIAC

Clicking the Share button in the dashboard will give us 2 options, and the difference is only at the last parameter which is "analyticsContext"

Analytics Tab
https://domain_name.my.salesforce.com/analytics/wave/dashboard?assetId=0FKB0000000LU1AOAW&orgId=00DB0000000EHcW&loginHost=ap10.salesforce.com&urlType=sharing&pageId=5dc8d0db-7e48-4964-8607-294b016f955a&savedViewId=8wkB0000000L9zkIAC&analyticsContext=analyticsTab

Analytics Studio
https://domain_name.my.salesforce.com/analytics/wave/dashboard?assetId=0FKB0000000LU1AOAW&orgId=00DB0000000EHcW&loginHost=ap10.salesforce.com&urlType=sharing&pageId=5dc8d0db-7e48-4964-8607-294b016f955a&savedViewId=8wkB0000000L9zpIAC&analyticsContext=analyticsStudio


Friday, May 27, 2022

Salesforce: Retrieve Custom Field Created Date

If you notice in Salesforce: Retrieve all fields from an Object, all options to retrieve all fields will not include Created Date, but only Last Modified Date, so this blog will share how to get the custom field creation date.

You need to query the CustomField object and select Use Tooling API.

Sample query: SELECT DeveloperName, CreatedDate FROM CustomField WHERE TableEnumOrId = 'Account'

use Salesforce Inspector

use Developer Console

Description:

  • DeveloperName field in the Tooling API does not include the suffix __c, so you need to manually add __c to get the API Name, e.g. DeveloperName = Region --> API Name = Region__c
  • TableEnumOrId field, for the standard object, it would be the object name e.g. Account, for custom objects, it would be the object Id, starting with 01Ixxxxxx, you can easily get the ID from the URL of the object from Object Manager.


Reference:


Tuesday, May 17, 2022

Salesforce: Retrieve List View columns and filters

Five years ago, I blog retrieving List View Sharing to get the list of users, groups, and roles that can access list views. This blog is to continue to get the columns and filters.

Open Workbench and from Rest Explorer, example: /services/data/v53.0/sobjects/Case/listviews/00B0o00000Fq3xQEAR/describe

Make sure to update the object name in red and List View id in orange.

To get the list of columns, click the "Show Raw Response" link. 


Copy the result of the column and use JSON to CSV tool to convert it into CSV or Excel file. Some of the columns here are added by the system and do not appear in the list view, such as Id, Record Type Id, etc.

To get the filters; looks for the query underneath, this will also show the fields, filter, and order in SOQL format:

SELECT CaseNumber, Contact.Name, Subject, toLabel(Status), toLabel(Sub_Status__c), toLabel(Priority), CreatedDate, Owner.NameOrAlias, RecordType.Name, Id, RecordTypeId, CurrencyIsoCode, LastModifiedDate, SystemModstamp, Contact.Id, ContactId, Owner.Id, OwnerId FROM Case WHERE IsClosed = false AND (Contact.Name != null OR Status = 'Escalated') ORDER BY CaseNumber DESC NULLS LAST, Id DESC NULLS LAST

** Use toLabel(fields) to translate SOQL query results into the user’s language.

Here is the original list view:


Page-level ad